


Tools for Quality Chinking
Chinking is an attractive and functional addition to any log home. This material efficiently fills the gaps between logs, improving your home's insulation and energy efficiency. You can apply chinking yourself, but it's important to have the right tools on hand for the job.
Backer Rods
Backer rods are an essential base for your project. They offer a non-adhering surface behind the chinking. The material will pull away from the backer rod over time, and maintain two-point adhesion with just the surrounding logs. This creates a bond with enough flexibility and give to expand, contract, and shift with the logs. Without a backer rod, the chinking will adhere to the back of the space as well, creating three-point adhesion that will fail over time.
Though the chinking eventually pulls away from the backer rod, it remains in the joint, providing a valuable layer of added insulation. The backing rod also helps control your installation costs by filling part of the gap so you're not using an excessive amount of chinking.
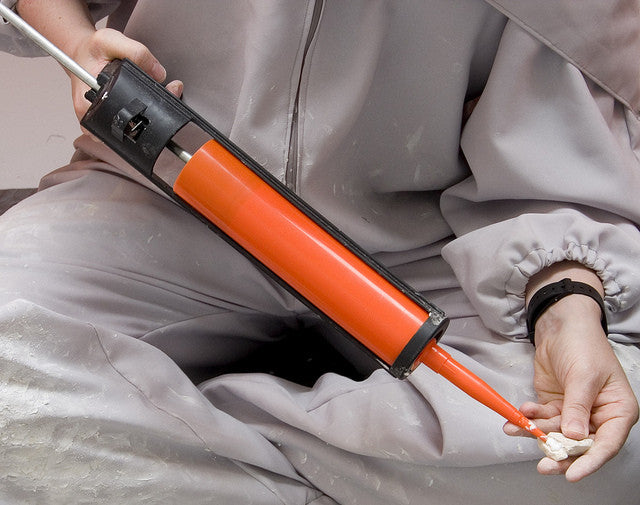
Caulking Gun
A caulking gun can give you more control over the application process when you're chinking. A caulking gun isn't necessary, but it is a useful tool if you're working with a small area, or need to apply chinking carefully to a very precise space. You can find bulk-loading air-powered models as well as bulk-loading manual guns. If you prefer the control of a caulking gun, but you're working with a large space, a commercial pump rental is the most efficient option for your project.
Follow Plate
A follow plate is an important piece of equipment that will minimize the chinking material's exposure to air. After you open the container of chinking, insert a follow plate in the pail. To fill the caulking gun, push the end of the gun through the hole in the follow plate. The plate will help protect your chinking as you work. When you're finished, you can remove the follow plate easily by inserting a handle rod into the open nut of the plate.
Trowel
Trowelling is an essential step in the chinking process that can determine the success or failure of the entire project. If you use your trowel correctly, you will ensure firm adhesion with both surfaces in the joint. To trowel your chinking, spray a release agent on the bottom of the trowel. Neatly run the trowel over the chinking in six- to 12-inch strokes, pressing the material firmly into place.
Use just enough release agent to allow the trowel to move smoothly along the joint. You shouldn't leave a wet run behind as you work. If you use too much release agent, your chinking may not seal properly, so make sure you apply only what's needed to prevent the chinking from sticking to the trowel, or pulling.
With the right equipment, you can install chinking neatly and efficiently. It's worth investing in quality tools for this home improvement job. Take your time and never rush your project with inadequate or low quality supplies.
Image via Flickr by Dominic's pics


